How I Made A React Chrome Extension That Made Browsing Faster

Hey there!
I Recently got myself into making chrome extensions (just the amateur ones). So I thought why not make another one and learn a bit more about it as well as participate in a hackathon. And here I am, with yet another chrome extension that solves a good enough problem.
Describe It
Imagine reading an article and stumbling upon a word or a term that you don't have a clue about. You just select the word, press Ctrl (Command for Mac) + Space on your keyboard, and wallah!
And just like your favorite Code Editor, it'll show you the description of the word.
Now let me walk you through the process of building Describe-It and how I came up with what all features that I have now and what all challenges I faced during the whole thing.
Table Of Contents
Design
Development
Design
No matter the complexity of the project, I always like to have a visual presentation of what I'm going to build beforehand. This way I spend less time thinking about that extra padding or border color during development.
1. Getting Inspiration
This is a good way to start designing your product. I Look at how products similar to mine have been designed, find some good fitting color schemes for the brand/product etc etc
Dribble is my favorite website for finding inspirations. Designers around the world share their beautiful works here. And to be honest, I love almost all of these designs here. You can see the effort the designers have put into each and every one of them.
There are tons of other websites too which you might like more than dribble. I've listed a couple of them down, check them out or continue reading 😊
2. Actual Design Phase
For this simple project, I went straight into making the HD Design rather than sketching and wire framing beforehand. If you a are curious one like me, you can look into those here: Sketching and Wireframing
Before continuing, I needed to make sure of some stuff that the extension would include.
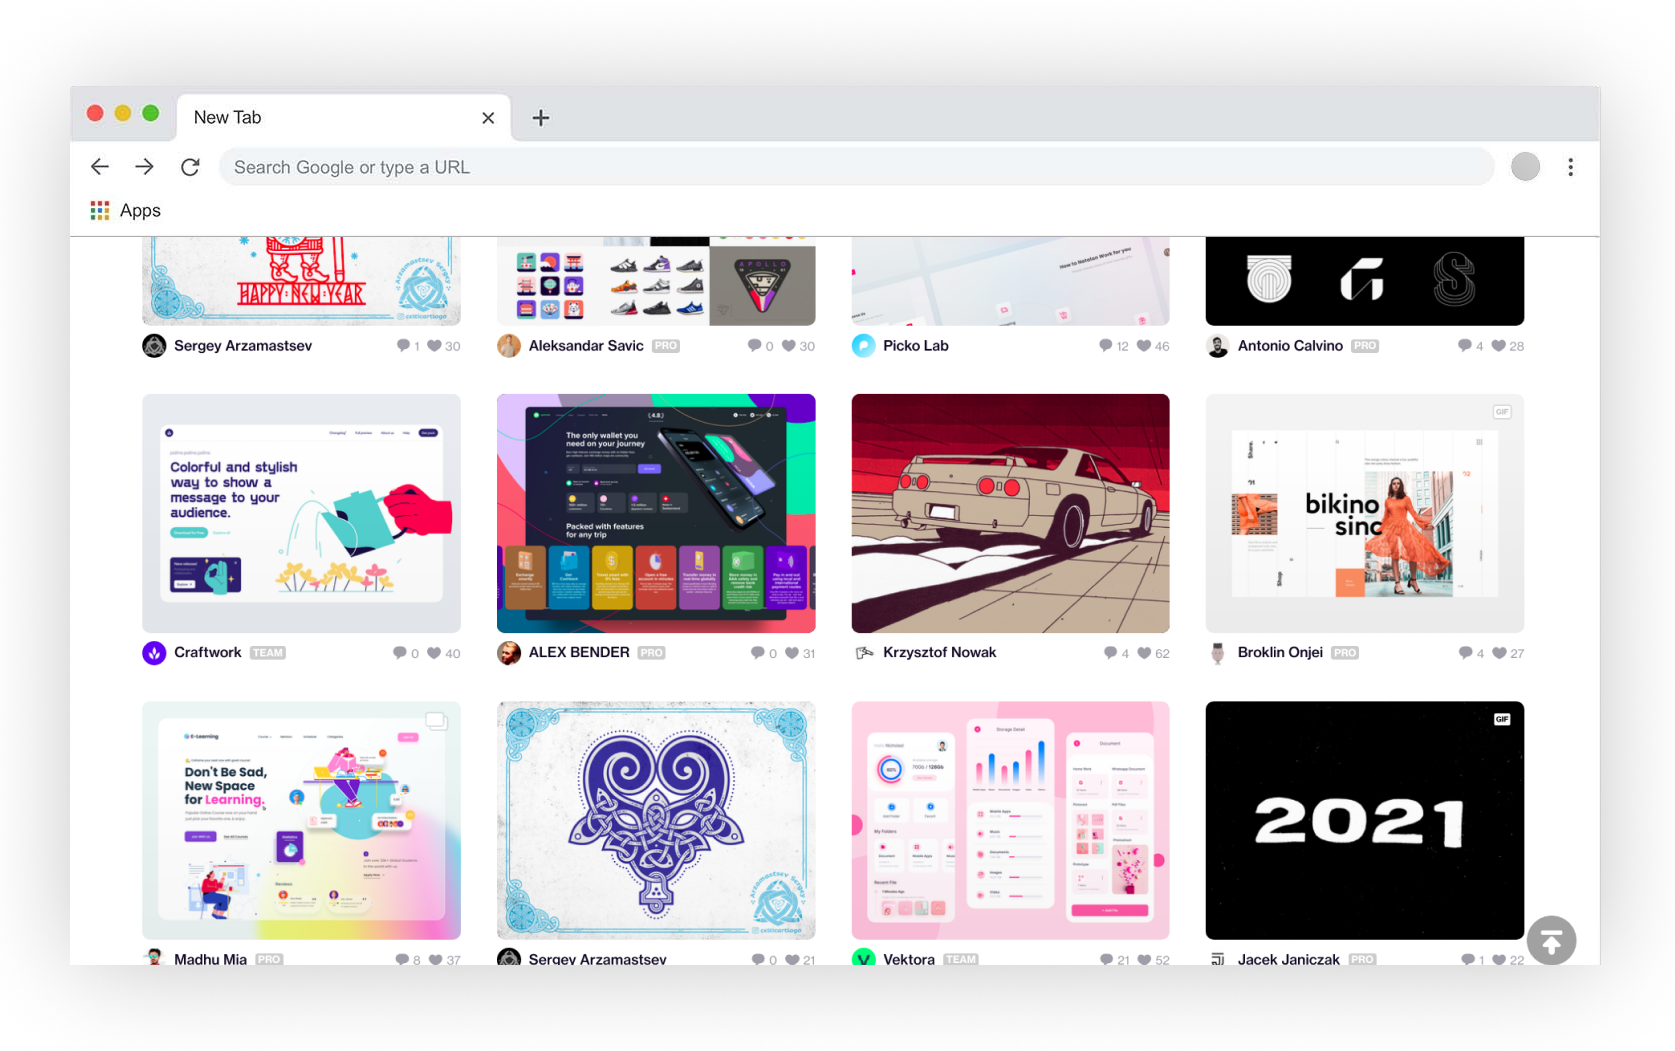
I knew that I needed to provide some kind of info about the text that was highlighted, so a word meaning was the first thing that came into my mind. But that alone could be insufficient for many. So after brainstorming for a few seconds (actually minutes), I ended up adding Wikipedia to the list. Basically, the idea was to get some data from Wikipedia about the selected word and display it there (luckily enough they got a free API for public use - will share links in the development section).
So now that I knew what I wanted to design, I head into Figma.com and started drawing some random shapes adding some colors into them. And those random shapes somehow ended up being this.
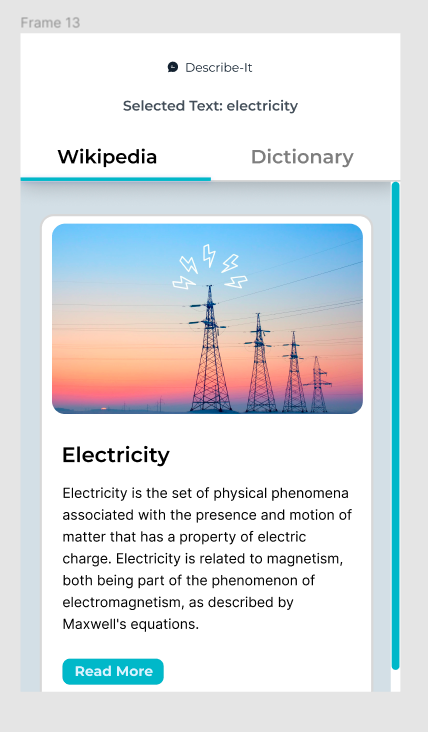
Dark theme is one of my favorite features which I add into almost every one of my apps. And yes I added it here too.
And that's it for the design part. After this I made a few tweaks here are there, so don't get confused seeing a different design in the final thing.
Development
Now getting to the super serious part or the only one I'm good at 😐
In the last chrome extension I made I had used pure HTML/CSS/JS. But this time I decided to use React with webpack and babel. (for those who don't know, webpack and babel are tools used to convert my React code into native html/css/js that supports almost every browser)
I found this nice React Chrome Extension boilerplate on GitHub and cloned it into my Dev environment. Looked through it a bit and made a test chrome extension. Everything went fine and fast.
Check it out here
1. Making the basic design
For this Project I decided to use tailwind as it speeds up my development a lot. And tailwind just had released their dark theme feature a while back, so I was also excited to use it in my Product.
I continued by adding the dark theme switch which was really easy and quick, compared to my most recent project with tailwind. (tailwind, I love you 3000)
2. Integrating with APIs
This project required an API that would provide me some dictionary data. After searching for something that was free and easy to use, I came upon an Unofficial Google API which was really easy to use and had data like the ones you found on google. And the best part, it was free!
Secondly I needed data from wikipedia. Some basic description of a wikipedia page and an image. Not one of the best APIs out there, but it works and its free! Wikipedia API
3. Challenges
One of the problems I realized about the extension was that there was no option to customize the shortcut for those who wanted something else, or have the default one already booked up. I couldn't find anything about changing the shortcut programatically on the official docs. So I had to link to the chrome settings from the extension and ask the user to change it from there. But to be honest, it wasn't much of a challenge (thanks to you know who - stackoverflow).
Another challenge I faced was finding a good Dictionary API that was actually free. All the ones I found were not either free or complicated to use like needing a REST API to act as a middleman. After asking few people on TechWithTim discord server, I found this cool little API that was very close to googles dictionary results and didn't need any setup. Unofficial Google API
Conclusion
After connecting the APIs I worked few more hours tweaking some stuff here and there. Adding a speak pronunciation button and few final touches to the design and UX.
And that's it folks! I hope I made something that's helpful to you all.
You can find the source code along with steps to install here on my GitHub repo: https://github.com/milan090/describe-it/ It's not yet on chrome webstore, but soon will be, as they take quite a bit of time to reviewing extensions (for security and privacy reasons).
If you got any feature suggestions, drop them in the comment section below. Peace!